Call Recording: The Complete Beginner’s Guide (2026)

You missed an important detail from a business call. You try to recall it, but it’s gone. Sound familiar? That single moment is why millions of people search for a reliable call recording app every month — and why getting the setup right the first time actually matters.
This guide covers everything: what call recording is, why your phone might not be doing it automatically, which free apps work best on Android, and the exact settings you need to configure. No technical background required.
What Is Call Recording? (Quick Definition)
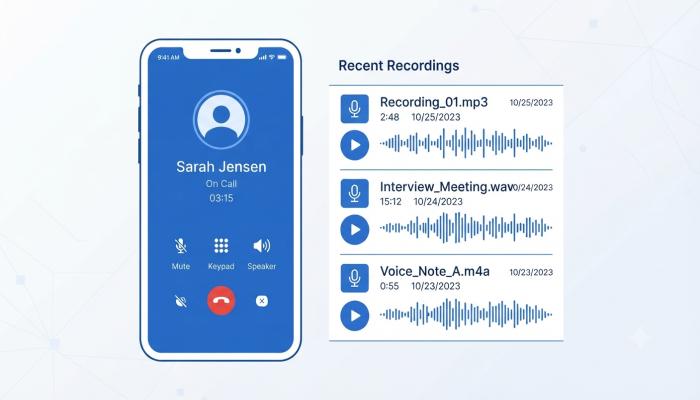
Call recording is the process of capturing the audio from an incoming or outgoing phone call and saving it as a digital audio file on your device or cloud storage. Modern apps can do this automatically, manually, or on a per-contact basis — giving you full control over what gets saved.
Most smartphones have some native call recording capability, but it’s often hidden, restricted by carrier settings, or unavailable in certain regions. That’s exactly why third-party apps exist.
Why Call Recording Actually Matters (It’s Not Just for Business)
People assume call recording is a corporate tool. I’ve seen plenty of first-timers surprised by how quickly it becomes indispensable for everyday life.
Here’s where it genuinely helps:
- Personal safety — Document conversations with contractors, landlords, or anyone who makes verbal promises.
- Medical appointments — Doctors share a lot of information fast. Recording lets you review it later without relying on memory.
- Freelancers and remote workers — Client briefs, project feedback, interview notes — all captured, automatically.
- Customer service calls — When you’re disputing a bill or escalating a complaint, having a recording changes the outcome.
- Language learners — Re-listening to native speaker conversations is one of the most underused study tools out there.
⚠️ Legal Note: In many countries, you must inform the other party that the call is being recorded. Two-party consent laws (like those in parts of the US and EU) require both sides to agree. Always check local laws before recording any call.
Also Read: Best Loan Apps in India (2026): Get Instant Cash in Minutes
How to Set Up Automatic Call Recording on Android
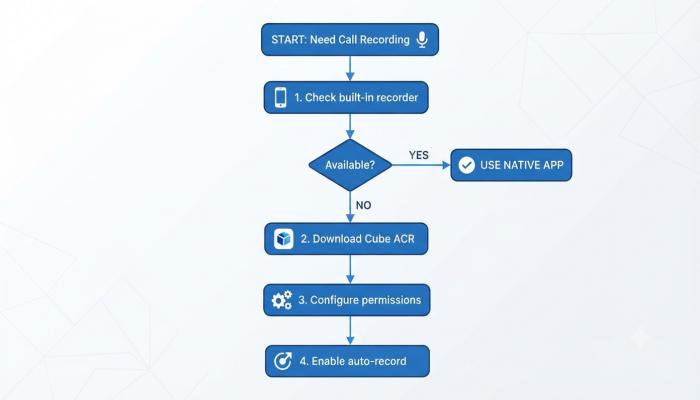
Step 1: Check Your Phone’s Built-In Call Recording Setting
Before downloading anything, check if your device already has the feature. Google’s native Phone app quietly rolled out automatic call recording to supported regions.
To check:
- Open the Phone app.
- Tap the three-dot menu (top right) → Settings.
- Look for “Call Recording” or “Record calls” option.
- Toggle it on and choose “Always record” or set it for specific contacts.
✅ Pro Tip: On Samsung Galaxy devices, the built-in recorder is under Phone app → More options → Settings → Record calls. It’s already there — most people just never find it.
If you don’t see this option, your carrier or region has likely blocked it. Move on to Step 2.
Step 2: Download a Reliable Call Recording App
The free options vary wildly in quality. Here’s a clear comparison:
| App Name | Platform | Free Tier | Auto Record | Cloud Backup | Works Without Root |
|---|---|---|---|---|---|
| Cube ACR | Android | ✅ Yes | ✅ Yes | ✅ Google Drive | ✅ Yes |
| Automatic Call Recorder (Boldbeast) | Android | ✅ Yes | ✅ Yes | ❌ Paid only | ✅ Yes |
| Call Recorder – ACR | Android | ✅ Yes | ✅ Yes | ✅ Dropbox | ✅ Yes |
| Rev Call Recorder | iOS/Android | ✅ Free | ❌ Manual | ✅ Yes | ✅ Yes |
| Google Phone App | Android (select) | ✅ Free | ✅ Yes | ❌ Local only | ✅ Yes |
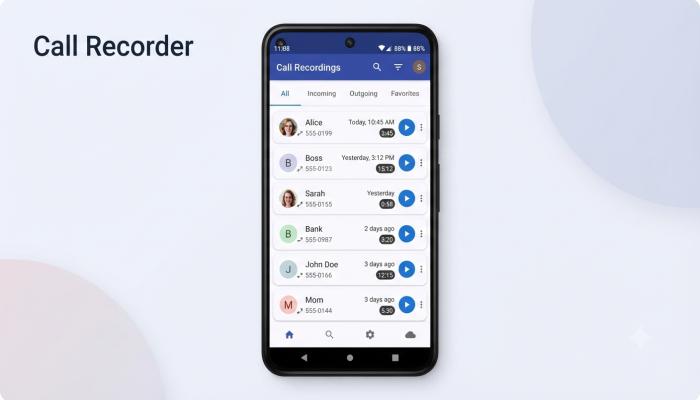
My recommendation for beginners: Start with Cube ACR. It has the most consistent recording quality across Android versions, and the free tier covers most personal use cases. The interface is straightforward enough that you won’t spend 20 minutes figuring out where the settings are.
Step 3: Configure Your Call Recording Settings
Once your app is installed, don’t just leave the default settings. Here’s what to configure immediately:
Recording Format:
- MP3 — Smaller file size, good for voice. Best for most users.
- WAV — Higher quality, larger files. Use only if you need to transcribe the audio professionally.
Storage Location:
- Set it to internal storage first, then back up to Google Drive weekly. Don’t rely on the cloud automatically if your internet connection is patchy.
Auto-Record Toggle:
- Enable “Record all calls automatically” from day one. You can always delete what you don’t need. You can’t go back and record a call that already happened.
Notification Setting:
- Keep the “Recording started” notification on. This is both a legal courtesy and a useful reminder.
Free vs. Paid: What Do You Actually Need?
Most beginners don’t need a paid app. The free tier of most call recording apps covers:
- Automatic call recording
- Local storage of recordings
- Basic playback and search
You’d only need to upgrade if you want:
- Transcription (speech-to-text from calls)
- Cloud sync with more than 2GB storage
- CRM integrations for sales teams
- Password-protected recordings
Automatic Call Recorder Pro (the paid tier of several apps) is worth it for professionals handling 20+ recorded calls a week. For casual use, the free automatic call recorder options work just fine.
Common Pitfalls (I’ve Seen These Repeatedly)
⚠️ Pitfall #1: The app records silence This happens when accessibility permissions aren’t granted. Go to Settings → Accessibility → Installed Apps and enable full permissions for your recording app.
⚠️ Pitfall #2: Only one side of the call is audible On many newer Android versions (Android 9+), Google restricted microphone access during calls for third-party apps. If this happens, switch to a VoIP-based recording method or use a phone with a dedicated call recording API.
⚠️ Pitfall #3: Storage fills up without warning Set a storage limit inside the app (usually under Settings → Storage Management). Auto-delete the oldest recordings after 30 days unless you’ve manually starred them.
⚠️ Pitfall #4: App stops recording after a phone update Always re-check permissions after a major Android update. Updates frequently reset app permission states.
Frequently Asked Questions
Q1: Is there a completely free automatic call recorder without any limits? Yes. Cube ACR and ACR by NLL both offer free automatic recording with no cap on the number of calls. Storage limits depend on your phone, not the app. The free versions cover unlimited call recording; paid tiers add cloud sync and transcription.
Q2: Why doesn’t my Android phone show a call recording option? Google disables this feature in regions where two-party consent laws apply, or when carriers restrict it. If the native option is missing, a third-party app like Cube ACR bypasses this through a different audio channel.
Q3: Does call recording work on both incoming and outgoing calls? Yes — all major recording apps capture both call types when auto-record is enabled. You can also set it to only record calls from specific contacts, which is useful for keeping storage usage low.
Q4: Where are my recorded calls saved on my phone? By default, most apps save recordings to Internal Storage → [AppName] folder. You can verify and change this under the app’s Settings → Storage Path. To find them manually, use a file manager and search for .mp3 or .wav files.
Q5: Can the other person tell they’re being recorded? Most apps play an audible “This call is being recorded” announcement when recording starts. You can disable this in app settings, but doing so may put you in legal violation depending on your location. Leave it on.
Q6: Will automatic call recording drain my battery? Minimally. Recording runs alongside the call itself — there’s no extra processing beyond saving an audio file. You’ll notice less than 3–5% additional battery draw in most real-world tests.
Q7: Does call recording in my phone work on WhatsApp or other VOIP apps? Standard call recording apps don’t always capture VoIP calls (WhatsApp, Telegram, Zoom). You need a screen recording tool with internal audio enabled, or an app specifically designed for VoIP — like Cube ACR, which explicitly supports WhatsApp calls on some Android versions.
Your Next Step: A 5-Minute Setup Checklist
You’ve got everything you need. Here’s how to act on it right now:
- [ ] Check your native Phone app first — Settings → Call Recording. Takes 60 seconds.
- [ ] If unavailable, download Cube ACR — free, no root required, works on Android 8+.
- [ ] Grant all requested permissions — especially Accessibility and Microphone.
- [ ] Enable “Record all calls automatically” in the app settings.
- [ ] Set recording format to MP3 and storage location to internal storage.
- [ ] Enable the “Recording started” notification — good habit, legal protection.
- [ ] Make one test call to confirm both voices are captured clearly.
- [ ] Set a 30-day auto-delete rule so storage doesn’t quietly pile up.
Done. You now have a fully functional, automatic call recording setup that most people spend weeks figuring out by trial and error.
Have a specific Android model or carrier that’s blocking call recording? Drop your device details in the comments and I’ll point you to the exact fix.